Archive
Genetic Algorithms Lab
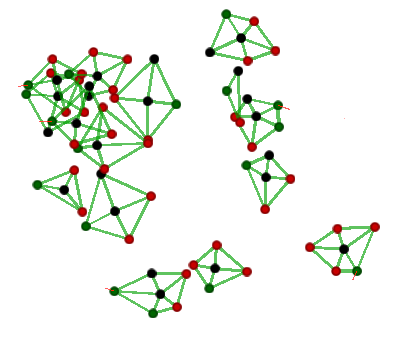
So a few years ago I did a project for the Genetic Algorithms assignment at college. My idea was to have tiny multi-cell organisms that have a simple goal: travel as far as possible! maybe to find new resources or escape from predators, you pick one 🙂
So the fitness of a creature is measured by how far it can go during its life span.
The creatures will start with random moving cells and evolve to more organized creatures with organized movements.
Please watch the video before reading. If the video failed to make you interested then I doubt that the text would succeed. You can also download the executable and the source code available at the end of this post.
FuchsGUI Update
Hello there, sorry for being inactive lately but I don’t feel like programming or learning something new :(.
Anyway, I fixed the issue in FuchsGUI where some text was blurry, the reason was that the text was being rendered with floating point values for position, something like (20.3f,29.4), this meant that spriteBatch should split physical pixels :(.
Anyway, thanks to a guy named Fab who told me how to fix this, the solution was something like this:
position.X = (int)Position.X;
position.Y = (int)Position.Y;
// Render here
So, here’s the fixed version (XNA4 only):
FuchsGUI v1.1 Source Bin XNA4 (Blurry Text Fixed)
I hope to see you later :)…
Busy busy busy busy :@
It’s been more than a month since my last post, I didn’t run out of ideas yet! but I’m really busy with college & its projects :(.
One of the projects I’m working on is a game for a Graphics project. it’s a third person shooter game, you can watch this short video to get an idea about the game 😀
Stuff to share later when I get the time to:
1-XNA Glow effect (post processing) : how to make your models glow!

Glowing Effect : Look how the red parts of the object are glowing, the glow extends towards the out side of the mesh
2-Third Person Shooter aiming :aiming in third person shooter is Read more…
XNA FuchsGUI part V
___________________________________________________
1-Introduction to the GUI.
2-Hello control :D.
3-Hello form.
4-Exporting forms easily from Microsoft Visual Studio Designer to FuchsGUI :D.
5-The future of FuchsGUI & some notes.
___________________________________________________
This part of the tutorial is the last part of the series..
I don’t know how to organize this post since it’s not a tutorial 😉 so I’ll start with some notes on FuchsGUI.

A post without an image is a dull post 🙂
Textures & Fonts:
As you saw each control takes a Texture2D parameter in the constructor, well… having many textures might have a bad impact on performance, because if you first draw a Button and then a TextBox the GPU will have to change textures.
A better solution is Read more…
XNA FuchsGUI Part IV
___________________________________________________
1-Introduction to the GUI.
2-Hello control :D.
3-Hello form.
4-Exporting forms easily from Microsoft Visual Studio Designer to FuchsGUI :D.
5-The future of FuchsGUI & some notes.
___________________________________________________
Okay, if you’ve been following the tutorials, you should have noticed how creating controls is somehow uncomfortable :(…
The first place where I used my gui was an artillery simulation project in XNA.
I had to make lots & lots of modifications to the forms of the simulation, If I wrote the code for every form manually I might have lost my mind and started screaming something like “Damn! this button should be 3 pixels lower”, “ops! this textbox should be wider :(“…
But before getting deep inside the gui of the simulation an idea came to my mind :D.
Why troubling myself with writing 1** lines of code for a single form while I can generate the code from Microsoft Visual Studio??
I’ll have to admit it’s a little lame to use the Visual Studio designer but I found it better than wasting time programming a designer :).
The main idea of the code generator is:
-Running a pre-made Visual Studio project (windows forms application) with a reference to the dll FuchsGUICodeGenerator ( Looooooooong name :D).
-Creating a new Windows.Forms.Form in the project.
-In the file Program.cs choose the form you created (more details later).
-Compile & run the project.
-A pre-made form will show and ask for generation options.
-You click a button and a complete class code is generated & copied to clipboard on demand :D.
We’ll recreate the calculator from Part III.
That ends the headlines :), let’s get to the details. Read more…
XNA FuchsGUI Part III
___________________________________________________
1-Introduction to the GUI.
2-Hello control :D.
3-Hello form.
4-Exporting forms easily from Microsoft Visual Studio Designer to FuchsGUI :D.
5-The future of FuchsGUI & some notes.
___________________________________________________
In part 2, I demonstrated how to create two types of FuchsGUI controls : Button & TextBox.
Well, most FuchsGUI controls have similar constructors, this lesson should be quite simple, what we will do is a simple calculator that adds\subtracts two numbers, the reason for this is to show you how to get values from TextBoxes & how to use Forms.
So create a new XNA 4.0 game , add a reference to FuchsGUI.dll (you might wanna go back and read step a in Part II)
Add the using directive first
using FuchsGUI;
Add these fields to Read more…
XNA FuchsGUI Part II
___________________________________________________
1-Introduction to the GUI.
2-Hello control 😀.
3-Hello form.
4-Exporting forms easily from Microsoft Visual Studio Designer to FuchsGUI :D.
5-The future of FuchsGUI & some notes.
___________________________________________________
Okay! let’s get our hands dirty :D.
In part I, I talked about my GUI in theory, what we will do now is:
a-Creating a new XNA4.0 game and preparing it to use FuchsGUI.
b-Adding two Buttons and one TextBox.
c-We want to achieve the following : when a button is clicked, the text in the TextBox will change to the name of the clicked button.
Three simple steps, but first you’ll need Read more…
XNA FuchsGUI Part I
___________________________________________________
1-Introduction to the GUI.
2-Hello control :D.
3-Hello form.
4-Exporting forms easily from Microsoft Visual Studio Designer to FuchsGUI :D.
5-The future of FuchsGUI & some notes.
___________________________________________________
Disclaimer :
-Please before reading note that this gui is for PC only, with some changes it might become runnable at the XBOX360
-The tutorials are for the XNA4.0 version, it’s just a matter of default parameters ( which are not -AFAIK- permitted in .NET3 c# ) , if you’re still using XNA3.1 maybe it’s time to move on :).
-This post doesn’t contain the FuchsGUI dll, please wait for the next post, but I really recommend reading this post if you’re willing to use my gui :).
Introduction:
An important thing any game or simulation needs is a good, reliable & simple graphical user interface (GUI), of course you can use System.Windows.Forms to create a gui for your XNA game but to me I prefer a gui from within the game, XNA code only :D, with this you can place the gui controls anywhere in the game window (I don’t know if it’s possible with Windows forms).
-ALRIGHT get to the the point already!!!
The point is that I’ve recently programmed a simple yet powerful gui library for both XNA3.1 and XNA4.0, The project started with XNA3.1 then was completed in XNA4.0
Here’s a teaser screenshot where I used my gui for an artillery simulation I programmed with two of my colleagues 😀

Please note that blurry text issue is now fixed, check the last part of the tutorial to download the fixed version
might not be that eye-catching cuz I created the textures in a hurry & using only mspaint
The beginning of the project started with Read more…


