MapApp7 : Creating MapView in XML
Hi :), welcome to the 7th part of my tutorial on how to create offline\online map app for android.
Series outline:
- Series aim.
- Theory you need to know.
- App design.
- Writing a TilesManager.
- Writing a TilesProvider.
- Seeing results with MapView.
- Adding web support
- Creating MapView in XML
______________________________________
So once again it’s an unplanned tutorial and it’s about maps 😀 .
The thing is that I got a number of comments asking about how to create the mapView in XML instead of creating it in java code, what we’ll achieve here is:
- Make the mapView creatable from XML.
- Assign a zoom level to the mapView in XML.
- Adding a position marker (drawable) to the mapView from XML.
- Add ZoomControls to the layout containing the mapView in XML.
Here’s how the final result should look like:
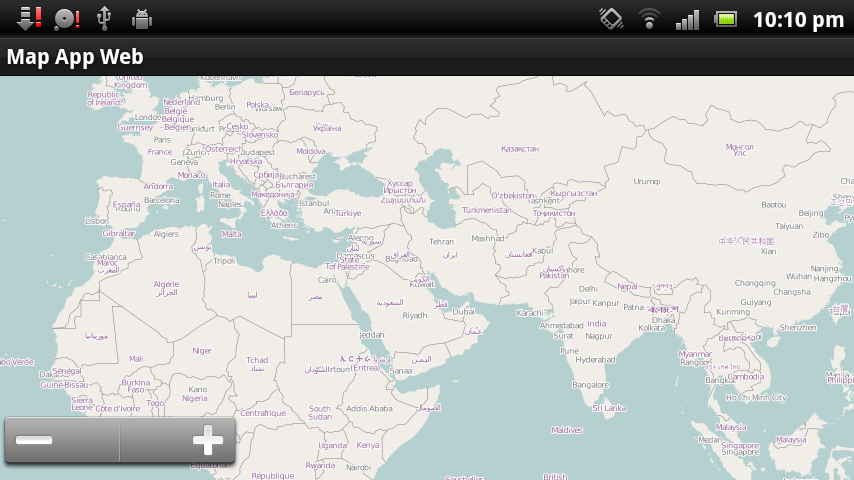
MapApp with ZoomControls
And just a note before you continue reading: you can add the mapView in XML like any other view, one difference though is that you cannot rely on using wrap_content in the view, since there’s nothing to wrap (something like text in a button for example) but this is not end of the world, you can either using fill_parent or use 0dip with android:layout_weight, only then the mapView will play nicely with other views :).
So either use a RelativeLayout and put your mapView and other views in it, or use LinearLayout and supply weight values for your views.
So if you’re still reading this please download the source code (along with the empty database) from MapApp 6 : Web Support since I’ll be building on the code from that tutorial. Just please remember to put the database World.sqlitedb in the folder /mapapp/ on the sdcard.
The steps we will have to do are the following:
- Changing TilesManager to make it able to calculate number of tiles on both X and Y any time and not just in the constructor.
- Creating mapview-attr.xml : a list of attributes we want our mapView to support in XML.
- Modifying MapView class to make it accept being created from XML.
- Creating main.xml, the file that contains our layout.
- Modifying the MapAppActivity to inflate layout using the usual way of setContentView(R.layout.X).
So let’s start with the very simple step of changing the TilesManager class.
1 – Changing TilesManager:
this step is easy, we just create a method called setDimensions like this:
public void setDimensions(int width, int height)
{
	this.viewWidth = width;
	this.viewHeight = height;

	// Simple math 🙂
	tileCountX = (int) ((float) viewWidth / tileSize);
	tileCountY = (int) ((float) viewHeight / tileSize);
}
If you remember from the previous tutorials : this simply calculates how many tiles can fit in the view in both X and Y, we just removed this calculation from the constructor to make it available anytime.
To avoid redundant code we remove a few lines from the constructor and it becomes like this:
public TilesManager(int tileSize, int viewWidth, int viewHeight)
{
	this.tileSize = tileSize;

	this.setDimensions(viewWidth, viewHeight);

	// Updates visible region, this function will be explained later
	updateVisibleRegion(location.x, location.y, zoom);
}
and that’s it for this step, we’ll never need to modify this class again :).
2 – Creating mapview-attr.xml:
When we later create our mapView in a layout xml file we want to be able to assign custom attributes to it in addition to the usual view attributes, we first need to declare those custom attributes somewhere, to do so we create a file under res/values called mapview-attr.xml (or whatever):
res/values/mapview-attr.xml
<resources>
	<declare-styleable name="MapView">
		<attr name="zoomLevel" format="integer" />
		<attr name="marker" format="reference" />
	</declare-styleable>
</resources>
So if you look at the file above you can see that we defined two attributes, one of them is an integer called zoomLevel and the other one is a reference to a resource that will be used later to get a drawable.
About explaining the structure of the file : there’s a little documentation on the matter on the Android developers guide and I highly recommend reading it since I learned the stuff here from there :).
Anyway, in general it’s obvious what the file above means.
3 – Modifying MapView class:
So this step is the longest, it’s not hard though. We will have to make sure that the class will still support creating the view outside of XML.
We also need to add a function to assign a TilesProvider to the map and we need to make sure nothing is using the field tileProvider if it’s null, more on that will come later.
If you remember from earlier we did override the method onMeasure and it was like this:
@Override
protected void onMeasure(int widthMeasureSpec, int heightMeasureSpec)
{
	// viewWidth and viewHeight were passed in the constructor
	setMeasuredDimension(viewWidth, viewHeight);
}
This method is used to determine the dimensions of the view.
Now we need to account for the case in which the view is being created in XML layout file, in this case we simply call super.onMeasure(widthMeasureSpec, heightMeasureSpec), but how can we know the way width\height of the view were specified? I simply assigned -1 to viewWidth and viewHeight in the constructor that will be called when inflating the layout from XML (coming later), so the method onMeasure will be like this:
@Override
protected void onMeasure(int widthMeasureSpec, int heightMeasureSpec)
{
	// Case1 : width and height are provided in the constructor
	if (viewWidth != -1 && viewHeight != -1)
	{
		// Setting width,height that was passed in the constructor as the
		// view's dimensions
		setMeasuredDimension(viewWidth, viewHeight);
	}
	// Case2: view was created using XML
	else
	{
		super.onMeasure(widthMeasureSpec, heightMeasureSpec);
	}
}
We’ll now add another constructor to the class (Use Ctrl+Shift+O in Eclipse to import the packages):
public MapView(Context context, AttributeSet attrs)
{
	super(context, attrs);

	// We don't know view dimensions yet, super.onMeasure will be called
	viewWidth = viewHeight = -1;

	if (!isInEditMode())
	{
		int zoomLevel = 0;
		TypedArray arr = context.getTheme().obtainStyledAttributes(attrs, R.styleable.MapView, 0,0);
	try
	{
		zoomLevel = arr.getInt(R.styleable.MapView_zoomLevel, 0);
		Drawable d = arr.getDrawable(R.styleable.MapView_marker);
		if (d != null) positionMarker = ((BitmapDrawable) d).getBitmap();
	}
	finally
	{
		arr.recycle();
	}

	tileManager = new TilesManager(256, viewWidth, viewHeight);
	tileManager.setZoom(zoomLevel);
	}

	initPaints();
}
As you can see this constructor takes the usual Context object and another parameter attrs which will hold the attributes set in the XML, we start by calling the super constructor and then assign -1 to width\height so that we know what to call in the overriden method onMeasure.
To make sure our view can be rendered in the graphical layout designer we need to make sure no exceptions are thrown in the constructor or in the method onDraw (because they’ll be called in the designer), for this purpose we use the method View.isInEditMode() which returns true if the view is being displayed in the UI designer.
In line 11 we retrieve the attributes passed in attr as a TypedArray, we then use this array to get out attributes by passing an index and a default value for getInt, and passing only an index to getDrawable.
The index R.styleable.MapView_zoomLevel is a combination of two things: the name of the styleable we declared (MapView in our case) and the name of the attribute itself with an underscore between them.
For the position marker we call getDrawable with the right index and then get a bitmap out of it.
We finally recycle the typed array (necessary step).
Now that we have the zoom level we can create the tileManager and assign the zoomLevel to it, you might notice that we’re passing viewWidth, viewHeight to the tileManager when they are still equal to -1, that won’t be a problem since when we later get the real view dimensions we can simply call tileManager.setDimensions(viewWidth, viewHeight) which we will do next.
We’ll override the method View.onLayout this method is called when the view dimensions are decided and we can finally use them:
@Override
protected void onLayout(boolean changed, int left, int top, int right, int bottom)
{
	super.onLayout(changed, left, top, right, bottom);

	if (!this.isInEditMode())
	{
		// Update the tiles manager
		this.viewWidth = getWidth();
		this.viewHeight = getHeight();

		tileManager.setDimensions(viewWidth, viewHeight);

		refresh();
	}
}
Since we only have a tileManager at run time (not when designing the UI) we use the help of isInEditMode(), so anyway now both getWidth() and getHeight() of the view will return correct values and we can use them for the tileManager and for the view itself.
So that’s almost it for this class, we just need to make a few more checks to avoid exceptions and add a method to set the tileProvider at run time.
We change the method fetchTiles and add a condition to exit the method if tileProvier is null:
void fetchTiles()
{
	// Update tilesManager to have the center of the view as its location
	tileManager.setLocation(seekLocation.x, seekLocation.y);

	// Get the visible tiles indices as a Rect
	Rect visibleRegion = tileManager.getVisibleRegion();

	if (tileProvider == null) return;

	// Tell tiles provider what tiles we need and which zoom level.
	// The tiles will be stored inside the tilesProvider.
	// We can get those tiles later when drawing the view
	tileProvider.fetchTiles(visibleRegion, tileManager.getZoom());
}
We will also add a few lines of code to the beginning of onDraw like this:
@Override
protected void onDraw(Canvas canvas)
{
	if (this.isInEditMode())
	{
		canvas.drawARGB(255, 255, 255, 255);

		String str = "MapView: Design Mode";

		// Text centering, Modified version of :
		// http://stackoverflow.com/a/11121873
		int xPos = (int) ((canvas.getWidth() / 2f) - fontPaint.measureText(str) / 2f);
		int yPos = (int) ((canvas.getHeight() / 2) - ((fontPaint.descent() + fontPaint.ascent()) / 2));

		canvas.drawText(str, xPos, yPos, fontPaint);
		return;
	}

	if (tileProvider == null)
	{
		canvas.drawARGB(255, 250, 111, 103);

		String str = "TilesProvider not set";

		// Text centering, Modified version of :
		// http://stackoverflow.com/a/11121873
		int xPos = (int) ((canvas.getWidth() / 2f) - fontPaint.measureText(str) / 2f);
		int yPos = (int) ((canvas.getHeight() / 2) - ((fontPaint.descent() + fontPaint.ascent()) / 2));

		canvas.drawText(str, xPos, yPos, fontPaint);

		return;
	}

	// .... the rest remains the same
The change above simply makes two checks:
1- If the view is in design mode then clear it to white and draw some text for the user to know that your view is working.
2- If the view is in running mode and no tileProvider is present just display a text about the issue and exit the draw method.
The method drawMarker will be changed to draw a simple circle if no positionMarker is present:
void drawMarker(Canvas canvas, Point offset)
{
	// Proceed only if a gps fix is available
	if (gpsLocation != null)
	{
		// Get marker position in pixels as if we're going to draw it on a
		// world map where the top left corner of the map occupies the (0,0)
		// pixel of the view
		Point markerPos = tileManager.lonLatToPixelXY(gpsLocation.getLongitude(), gpsLocation.getLatitude());

		// Add offset to the marker position
		int markerX = markerPos.x - offset.x;
		int markerY = markerPos.y - offset.y;

		// If marker bitmap exists
		if (positionMarker != null)
		{
			// Draw the marker and make sure you draw the center of the
			// marker
			// at the marker location
			canvas.drawBitmap(positionMarker, markerX - positionMarker.getWidth() / 2, markerY - positionMarker.getHeight() / 2,
bitmapPaint);
		}
		else
		{
			// Draw an ugly circle if no bitmap is set 😛
			canvas.drawCircle(markerX, markerY, 10, bitmapPaint);
		}

	// ... the rest is the same
another check is done in onZoomChanged:
protected void onMapZoomChanged()
{
	if (tileProvider != null) tileProvider.clear();

	fetchTiles();
	invalidate();
}
and finally we add this method to the class:
public void setTilesProvider(TilesProvider tilesProvider)
{
	this.tileProvider = tilesProvider;
}
We’re finally done with this class 😀 , the rest are just simple steps.
4 – Creating main.xml:
create the file res/layout/main.xml
<?xml version="1.0" encoding="utf-8"?>
<RelativeLayout xmlns:android="http://schemas.android.com/apk/res/android"
    xmlns:custom="http://schemas.android.com/apk/res/com.mapapp.mapappweb"
    android:id="@+id/frame"
    android:layout_width="fill_parent"
    android:layout_height="fill_parent" >

    <com.mapapp.views.MapView
        android:id="@+id/map"
        android:layout_width="fill_parent"
        android:layout_height="fill_parent"
        custom:marker="@drawable/marker"
        custom:zoomLevel="12" />

    <ZoomControls
        android:id="@+id/zoom"
        android:layout_width="wrap_content"
        android:layout_height="wrap_content"
        android:layout_alignParentBottom="true"
        android:layout_alignParentLeft="true" />

</RelativeLayout>
A simple relative layout, first note line 3:
xmlns:custom=”http://schemas.android.com/apk/res/com.mapapp.mapappweb“
the word custom can be whatever you want just make sure it’s unique in the xml file (so don’t use android for example)
com.mapapp.mapappweb is our package name.
In line 8 we used the full name of the class (It is the fully qualified name of the custom view class).
In lines 12 and 13 we provided the values for the custom attributes we defined earlier.
So if you now switch to the graphical designer hopefully you’ll see something like this:

MapView in graphical designer
5 – Modifying MapAppActivity
First add the field zoomControls to the class along with two onClickListeners like this:
ZoomControls zoomControls;

OnClickListener zoomIn_Click = new OnClickListener()
{
	@Override
	public void onClick(View v)
	{
		mapView.zoomIn();
	}
};

OnClickListener zoomOut_Click = new OnClickListener()
{
	@Override
	public void onClick(View v)
	{
		mapView.zoomOut();
	}
};
Simple enough I guess, next we modify onResume to look like this:
@Override
protected void onResume()
{
	setContentView(R.layout.main);

	mapView = (MapView) findViewById(R.id.map);
	zoomControls = (ZoomControls) findViewById(R.id.zoom);

	initViews();

	// Restore zoom and location data for the MapView
	restoreMapViewSettings();

	// Creating and registering the location listener
	locationListener = new MapViewLocationListener(mapView);
	LocationManager locationManager = (LocationManager) getSystemService(LOCATION_SERVICE);
	locationManager.requestLocationUpdates(LocationManager.GPS_PROVIDER, 0, 0, locationListener);

	// Never ever forget this 🙂
	super.onResume();
}
We simply created the layout and got references to our views, we now need to modify initViews:
void initViews()
{
	// Creating our database tilesProvider to pass it to our MapView
	String path = Environment.getExternalStorageDirectory() + "/mapapp/world.sqlitedb";
	tilesProvider = new TilesProvider(path, newTileHandler);

	// If a location was saved while pausing the app then use it.
	if (savedGpsLocation != null) mapView.setGpsLocation(savedGpsLocation);

	mapView.setTilesProvider(tilesProvider);

	// Update and draw the map view
	mapView.refresh();

	zoomControls.setOnZoomInClickListener(zoomIn_Click);
	zoomControls.setOnZoomOutClickListener(zoomOut_Click);
}
And that’s it for this tutorial 😀 hopefully now the app will run like before and the zoom controls will work too.
Here’s the source code (Eclipse project): MapApp_Web_XML_Support.zip (57 KB)
_____________________
Here’s an xml layout that’s a little more complex than the one before just to demonstrate the results:
res/layout/main2.xml:
<?xml version="1.0" encoding="utf-8"?>
<LinearLayout xmlns:android="http://schemas.android.com/apk/res/android"
    xmlns:custom="http://schemas.android.com/apk/res/com.mapapp.mapappweb"
    android:id="@+id/frame"
    android:layout_width="fill_parent"
    android:layout_height="fill_parent"
    android:orientation="vertical" >

    <Button
        android:layout_width="fill_parent"
        android:layout_height="wrap_content"
        android:layout_weight="0.3"
        android:text="upper button" />

    <LinearLayout
        android:layout_width="fill_parent"
        android:layout_height="0dip"
        android:layout_weight="0.3"
        android:orientation="horizontal" >

        <com.mapapp.views.MapView
            android:id="@+id/map"
            android:layout_width="0dp"
            android:layout_height="fill_parent"
            android:layout_weight="0.5"
            custom:marker="@drawable/marker"
            custom:zoomLevel="12" />

        <Button
            android:layout_width="0dp"
            android:layout_height="fill_parent"
            android:layout_weight="0.5"
            android:text="Side button" />
    </LinearLayout>

    <Button
        android:layout_width="fill_parent"
        android:layout_height="wrap_content"
        android:layout_weight="0.3"
        android:text="Bottom button" />
</LinearLayout>
Here’s how it looked in the graphical designer:

MapView in complex layout
You can also specify values for the width\height of the view in XML and it works.
One thing worth mentioning : if the MapView becomes small it might not render the correct number of tiles due to the calculation done in the TilesManager, to fix this just add one or two to both tileCountX, tileCountY in TilesManager.setDimensions.
I hope you followed the tutorial and it worked 😀 If you have any improvements or questions please use the comments below 😀 .
Leave a reply to Vinícius Cancel reply


I think there’s a mistake on instruction number 2.
There’s no code in that part.
Thank you!
And instruction number 4 too.
Hi Vinícius,
I assume you’re replying to my comment here on another post :), even as an admin and owner of this blog I can’t move comments from one post to another :(.
Anyway, I double checked the code and the methods fetchTiles and drawTiles both exist.
Just to make sure we are on the same page : the steps I provided are to be applied on the code of MapApp not FuchsMaps, the steps can be applied on the project found here (MapApp_Final Source Code.zip).
Can you please make sure you downloaded the right project? FuchsMaps is slightly different from MapApp.
I would appreciate it if you reply to the main thread :).
I’m awfully sorry dude.
I made a mess of it! In fact I’m not replying your other comment. I just confuse things in this post here “MapApp7 : Creating MapView in XML.”
I’d like to ask sincerely apologize about what I’m doing in your blog. Please, you can delete my comments in this post. They are irrelevant and, as I said before, it was a mistake of my interpretation.
I’d like to thank you so much! This days your blog is saving me! Congratulations for the content and thanks for so many help and time dedicated to answer the questions we make.
Opppppps! Sorry for making this mistake! now I understand what you meant!
Wordpress sometimes messes with the code if it contains xml tags (that’s one of the reasons I keep a backup copy of every post as plain HTML).
I’ll fix it right away.
Thank you for notifying me I really appreciate it.
No need to apologize on your part, the mistake was mine 🙂
It’s you guys who keep me going, I appreciate your questions and opinions :).
Hello! This is a really good project and I wish I could use this code. But I can’t, because if I try make a new activity from the MapAppActivity the program always crash. Can you help me to solve this problem?
Thanks :), what exception is shown in the LogCat?
Hello Fuchs, i m thankful to you for such a nice app with source code available for other user. God bless u. Anyways, my question is, i m trying to make map view dimension set adjust automatically according to loaded image file (sqlitedb file). I tried reprogrammed mapView but all effort were ineffective. Therefore, please help how to get loaded map dimension and zoom level and adjust this application view, so user only see available zoom level and he cannot pan outside of map dimension.
Hi Saifee, what you need to do is the following:
1- Create the tiles provider
2- then request a tile with a raw sqlite query
SELECT * FROM tiles LIMIT 1
and decode the bitmap to get it’s width/height
3- Get the min/max zoom levels with two more queries
db.rawQuery(“SELECT MAX(z) FROM tiles”, null);
db.rawQuery(“SELECT MIN(z) FROM tiles”, null);
remember that those z values could be inverted
4- Create the TilesManager with the values we extracted
These are the main guidelines, sorry for not having enough time to provide a full implementation.
I hope this works for you, let me know if you find any trouble :).
Thanks for ur reply.
1. I think you are not storing “z” value like u r taking “x”, “y” and image in TilesProvider.java class
2. also how can i configure ur application that when map is loaded from DataBase user can only pan with the dimension of loaded map.
Also can you explain me in ur reply what is LIMIT 1. Sorry i m not gud in Database. 😦
Hi Fuchs!
Thanks alot i figured out how to get max and min zoom level from your previous post with help of query for z column in database. however, for width and height problem. How to calculate total width and height when where i should make it fix in MapView. It seems that the titles are being loaded from database in a for loop in MapView.java onDraw function.
Hi Saifee, since all tiles (bitmaps\images) in the database have the same dimensions we only need to get one tile to get it’s dimensions.
To do that we query and tile from the database. Since we don’t know what index (x/y/z) to use we can make a non-specific query to get any tile:
SELECT * FROM tiles
But this will return a cursor with ALL tiles and we only need one! so we add the LIMIT 1 to only get one tile:
SELECT * FROM tiles LIMIT 1
After that you’ll have to process the cursor to get the bitmap, after that you can get the width/height and pass those two parameters (along with min/max zoom) to the TilesManager
ok fuchs, thanks alot i run the query in navicat and it return me that image but TilesManager.java class is developed for full world map and on setting viewWidth and viewHeight in init() function of FMapsActivity.java. It only shows me black screen. Also, i see this operation more complex as more and more modification may be required not only in MapView.java but Also in TilesManager.java. I
If possible can u guided me that instead of fixing the view to loaded image file. On loading the map file from folder. The view automatically seeks its position to loaded image coordinates and user don’t need to drag anymore. Because if image file is for very small area and fixing the zoom levels according to available zoom level in image file. Then i m unable to guess either the image is on left, top, bottom or right side.
any help plz